Wood and Wasps
I moved into my own apartment in June of 2020. After two months of attempting to do school and work on my childhood desk, I knew that if I was working from my apartment indefinitely, that I wanted a table that would not cause me back pain. After looking up table after table online, I realized I just needed something simple. From there, I was determined to build my own desk.
The plan for the desk was literally two parts - the plywood top, and hairpin legs. Despite that, it took me until November of 2020 to actually complete it… oops.
The hairpin legs were the easier part. In May, I bought an ErgoChair and knew the minimum height of the chair. I averaged three different “ergonomic desk setup” calculators, which told me that the height of my table should be 28”, so I ordered 27” legs and planned for a 1” thick tabletop.
The plywood top is what I put off the most. Around the same time in May, I knew where locally I would purchase the wood. I knew I wanted baltic birch plywood, I knew the max length of precut plywood (48”) that the store sold, but I didn’t actually purchase the sheet for months! I originally planned to bevel the sides of the plywood, so that each side of the table would be cut at a 15 degree angle. My neighbor had a table saw I could use, but I was so shy to ask that I kept putting it off. Eventually, in October I got tired of my own procrastination and the eyesore of the plastic folding table I was using in the interim, and bought the sheet. I didn’t end up asking my neighbor about the table saw, and just settled for regular table edges.
… And then the plywood sat on the floor of my apartment until November. There were really just two steps needed: sanding & sealing. For sanding, I used an orbital sander which I bought off FB marketplace in 2017. For sealing, I purchased a water-based poly from the hardware store and a foam brush. With all of the equipment acquired, there was nothing left to procrastinate.
Sanding the table down required three passes, with a finer grit sandpaper each time. By the second pass, I started noticing a few wasps hovering around the outdoor area I was sanding. I continued until a wasp hovered right next to my hand, and I noped back into the inside. It turns out that wasps really do not like vibrations and can get territorial due to them. Unfortunately, my sander seemed to produce those vibrations.
After 30 minutes of watching at least 10 wasps fly around the my sanding area, I did the third sanding with MANY wasp interruptions and occasions of me running away from the wood (and there was definitely a neighbor watching this all happen from the gym right next to my apartment). From there, I spent another two days applying three layers of poly (with hours of dry-time in between) to ensure there was at least some water-resistance on the table.
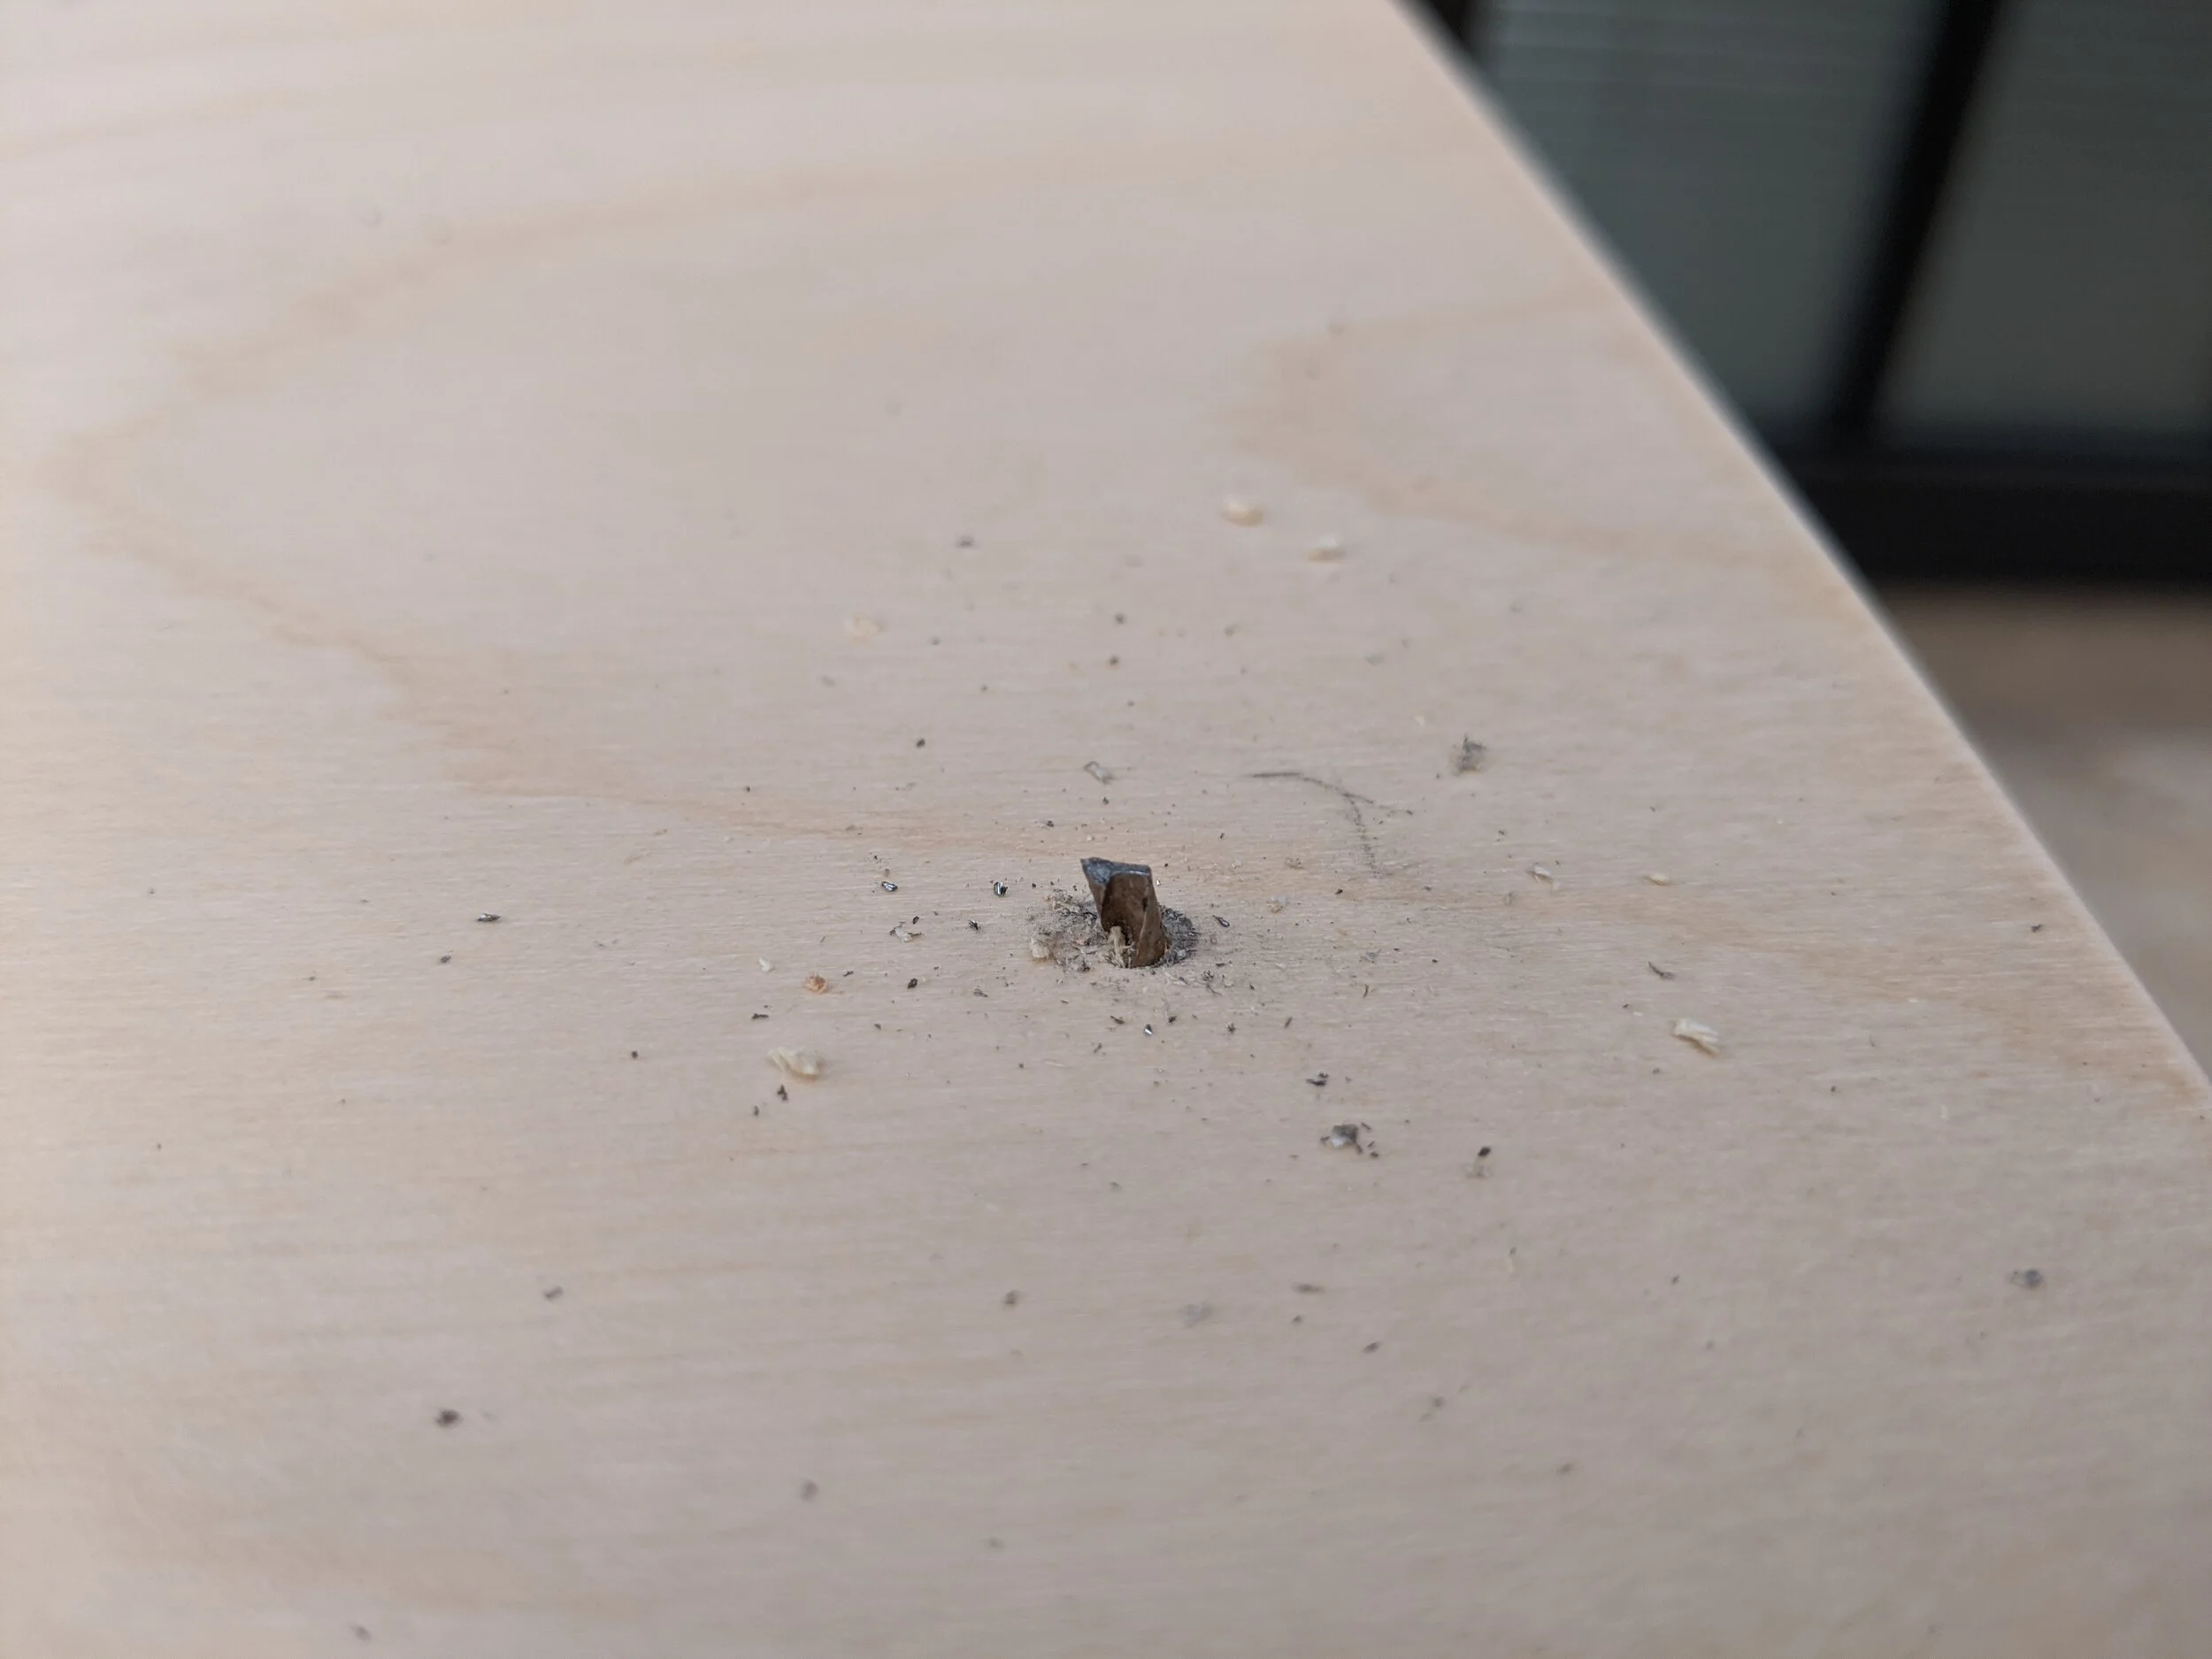
Next was the table assembly! WOw this feels like a long post, if you’ve made it this far you deserve to enjoy more of my failures. After deciding where I wanted the hairpin legs, each leg required 4 screws to attach to the plywood. The best practice when screwing into wood is to pre-drill holes with a smaller diameter than your screw, so that the wood doesn’t get super stressed and crack the way it might if you just start drilling screws into it immediately. My drilling skills are not the best, and at one point I came in at an angle, snapping the drill bit into the wood.
I ended up having to use pliers to manually twist as much of the drill bit out of the table, and had to re-measure and move all my legs to avoid putting a screw into the remaining drill-bit inside the wood..
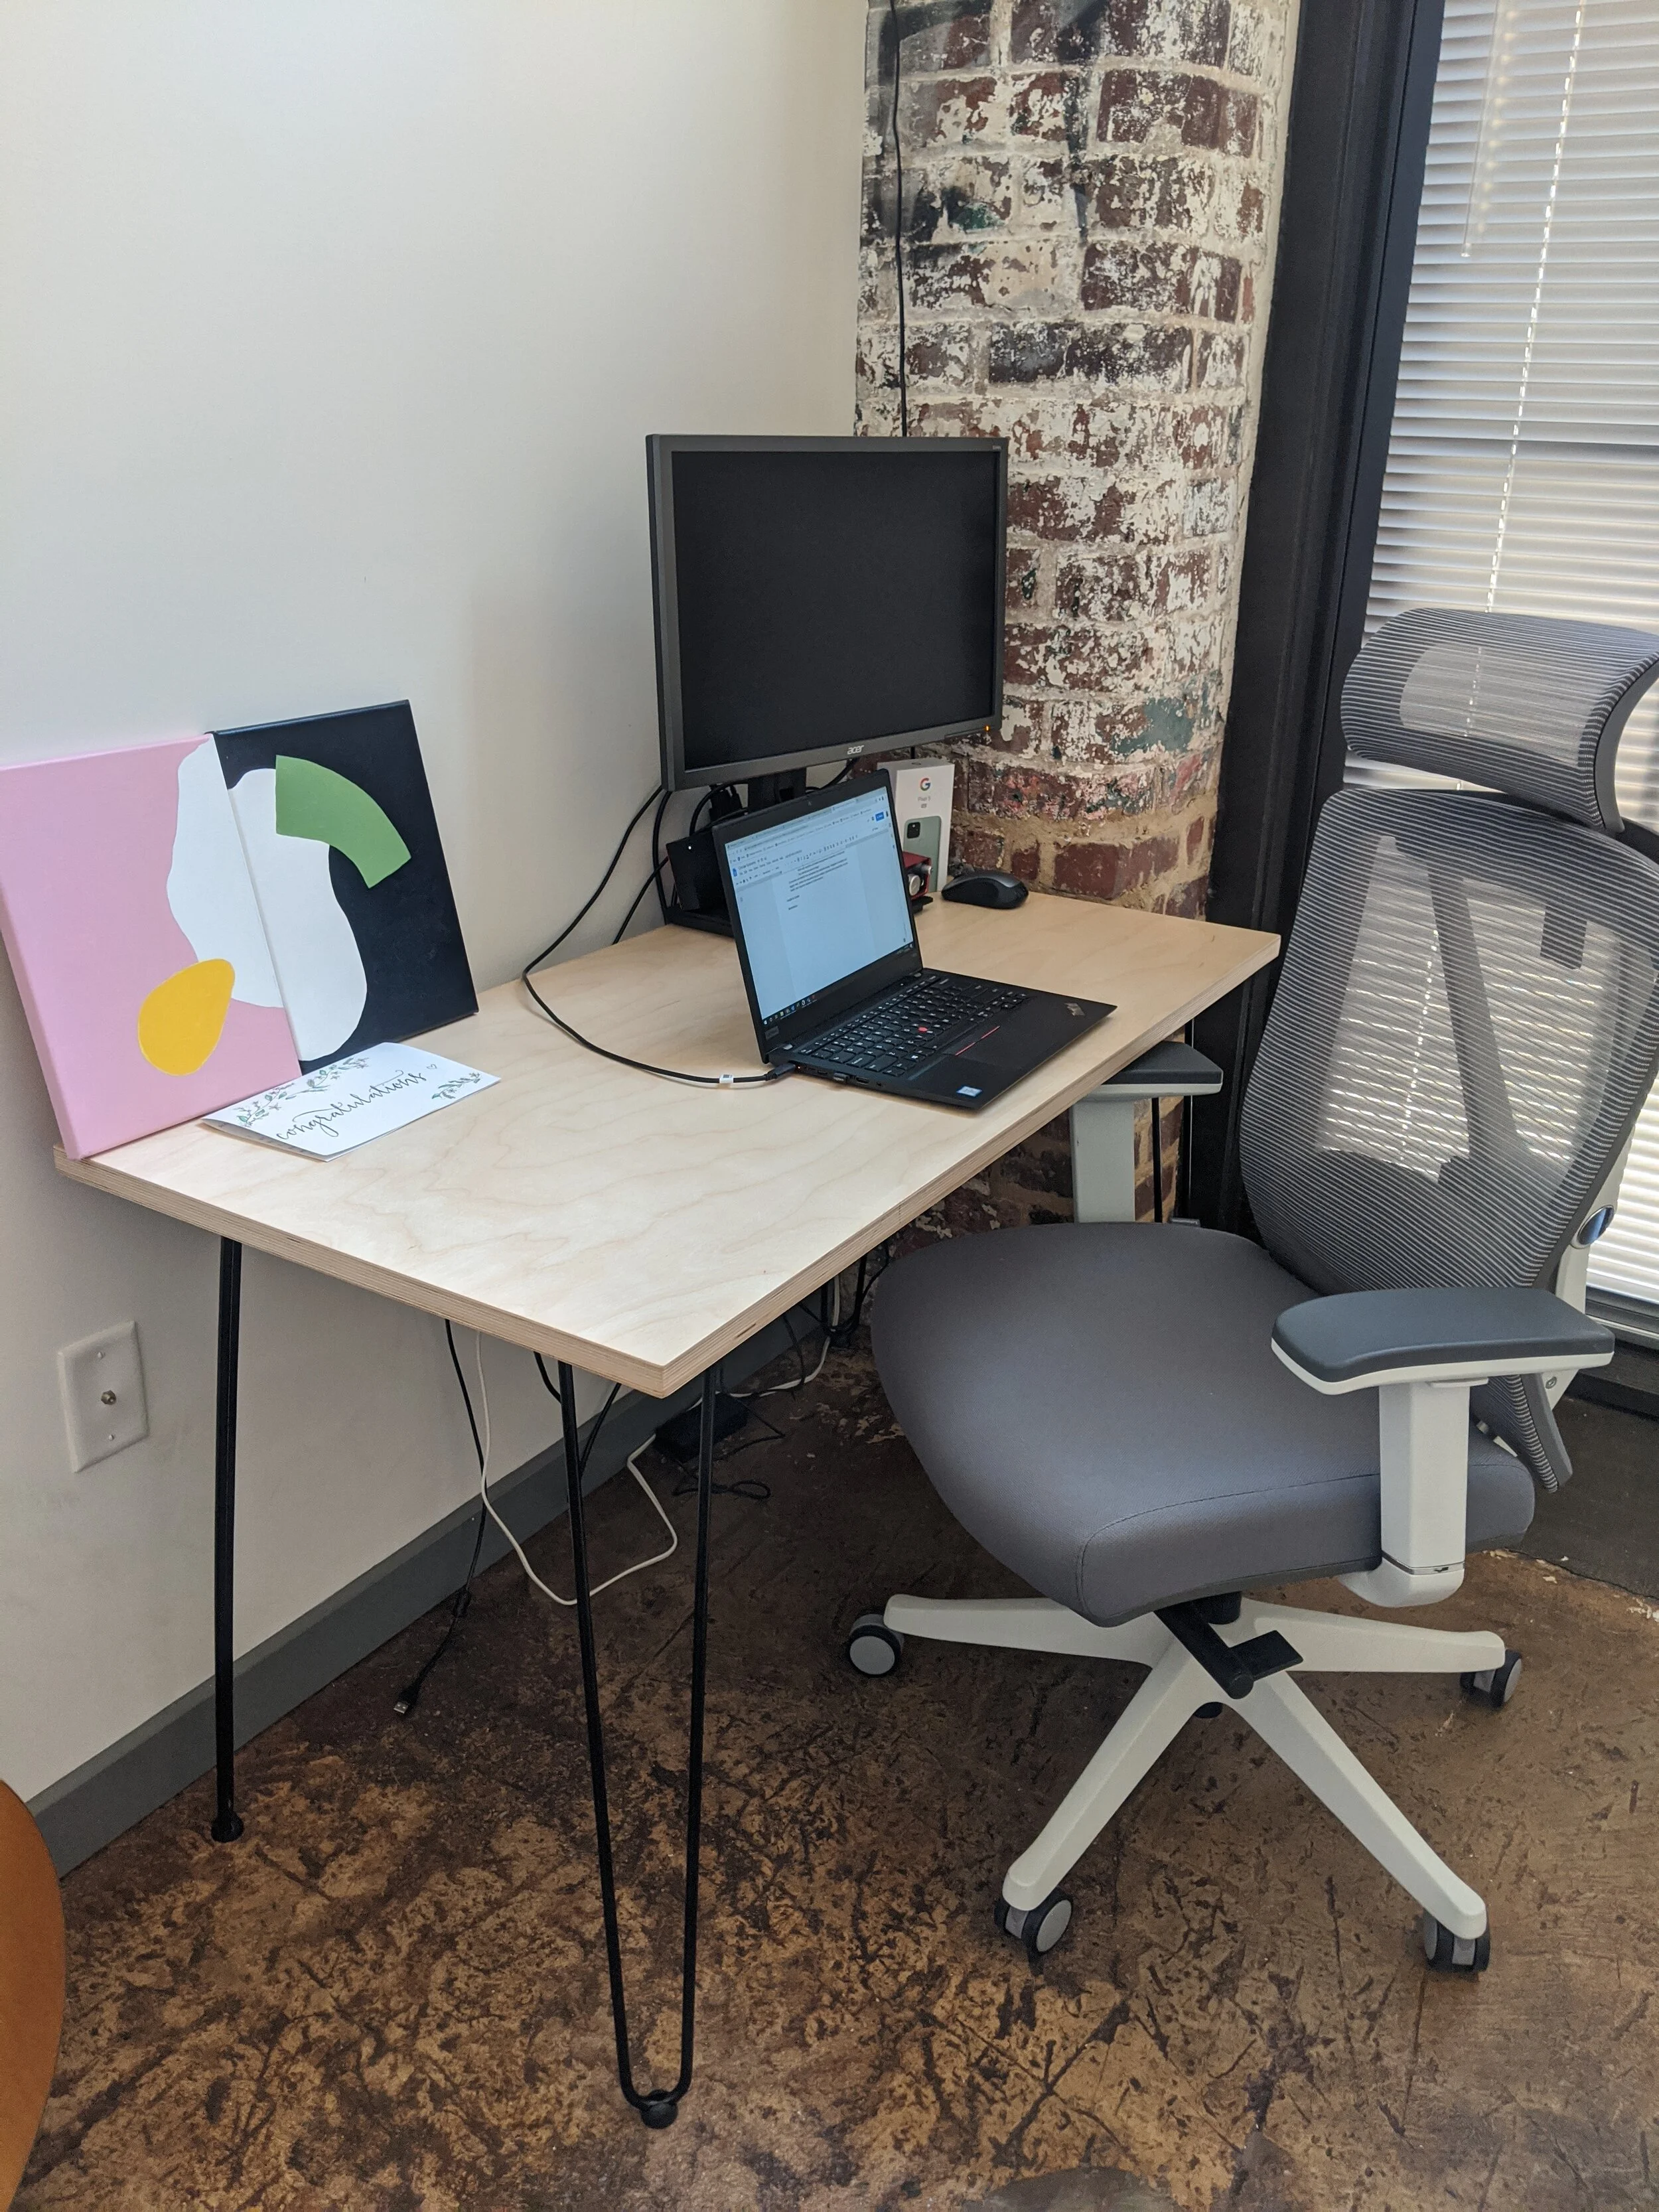
FINALLY, the table was complete!! I’m still working on figuring out how to decorate the wall where the desk faces, but for now here’s a pic of the end result!
If there’s anything I’ve learned from this project, it probably has something to do with procrastinating. I put off this project for months, when in reality it was simple. And even though it was simple, there were many ways for me to mess up. In those times I had to determine when was appropriate to take a break and step away, and when I just had to push through and deal with the mess I made. I am very happy with the results of this project, and recommend anyone to make a similar desk if it fits their needs!